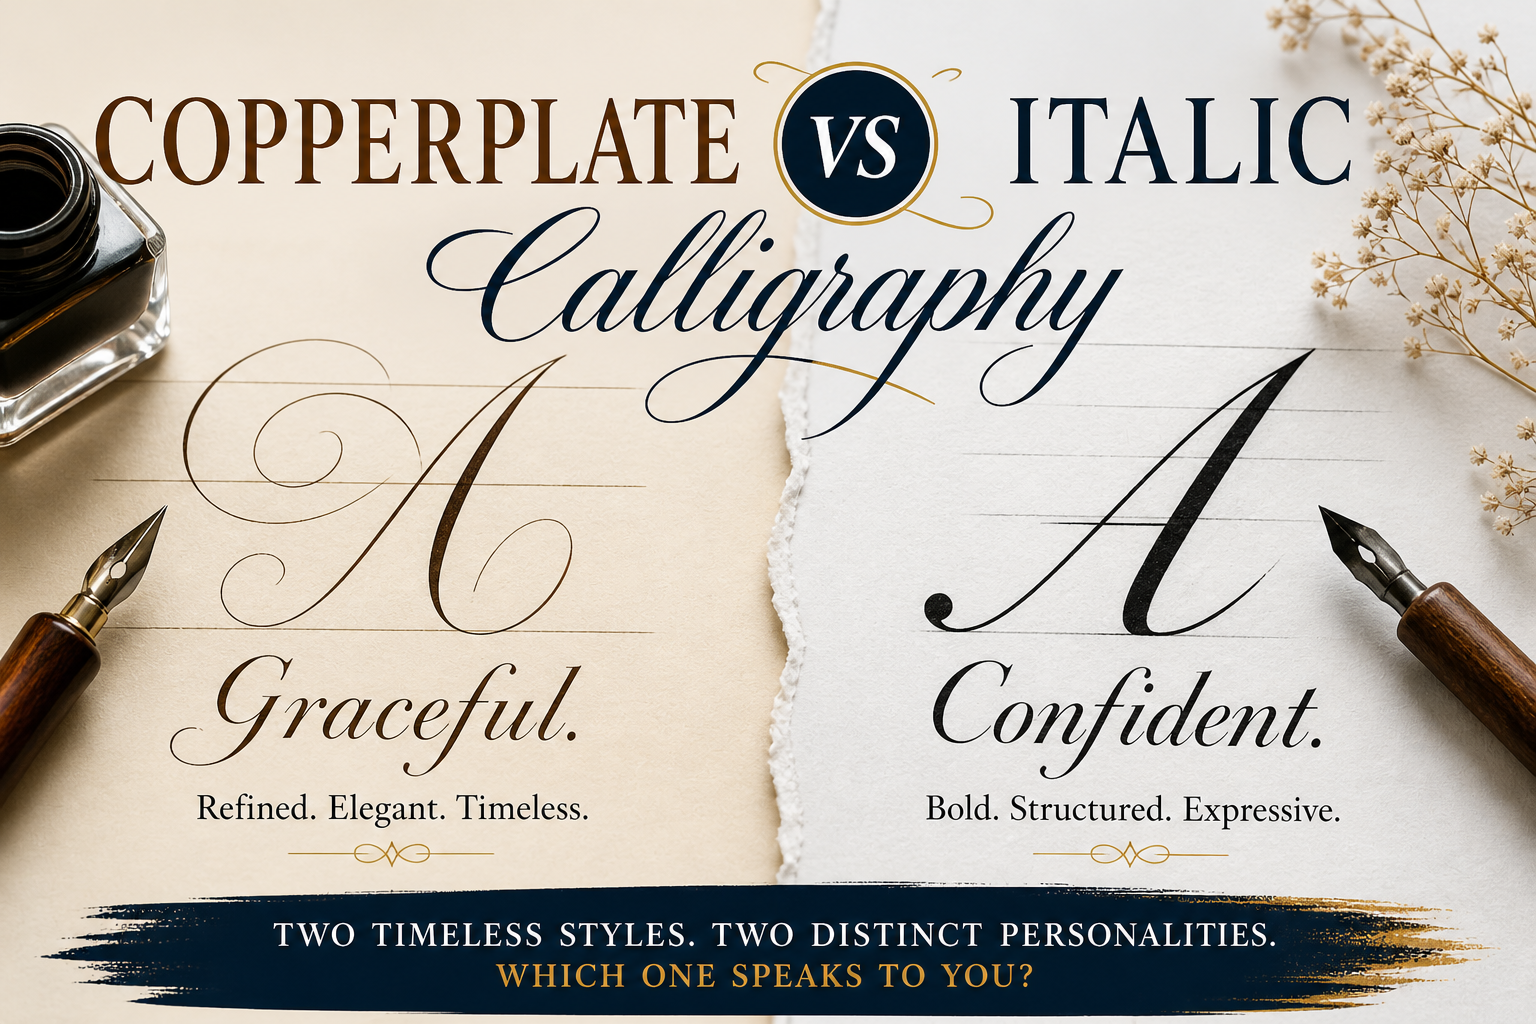


If you are a complete beginner with no prior calligraphy or drawing experience, start with Italic. Its thick-thin contrast comes from a fixed pen angle rather than hand pressure, which removes one entire variable from the learning process. Copperplate is more historically ornamental and dominates formal wedding stationery, but it uses a flexible pointed nib controlled by pressure, which typically takes months not weeks to master. Learn Italic first to build pen control, then move into Copperplate once your foundational strokes are steady.
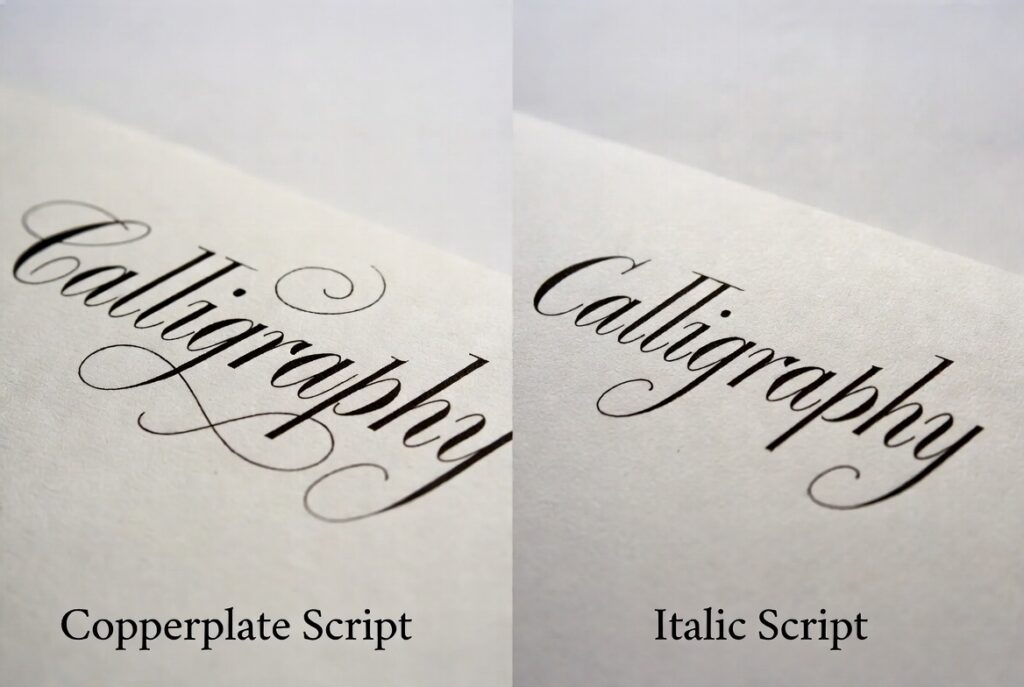
Copperplate and Italic are the two scripts beginners compare more than any other pairing in calligraphy, and for good reason — they represent two genuinely different mechanical systems, two different historical eras, and two different levels of commitment. This guide breaks down exactly how they differ, which one to learn first based on your goals, and what tools and paper each one actually requires.
Copperplate vs Italic at a Glance
| Copperplate | Italic | |
| Nib type | Pointed, flexible steel nib | Broad-edge (flat/chisel) nib |
| Thick-thin source | Hand pressure | Fixed pen angle (~45°) |
| Historical origin | 18th-century English writing masters (English Roundhand) | 15th-century Italian Renaissance |
| Slant angle | 55 degrees | Slight forward lean, less rigid than Copperplate |
| Paper needs | Smooth, bleed-resistant, dedicated calligraphy paper | Layout, cartridge, or good printer paper |
| Typical learning curve | Several months to look confident | 2–4 weeks to basics |
| Forgiveness of mistakes | Low — a shaky hand shows immediately | Higher — angle-based strokes are more repeatable |
| Most common use | Wedding stationery, formal correspondence, engrossing | Envelope addressing, everyday elegant handwriting, foundational training |
| Recommended first tool | Pointed dip pen (Nikko G nib) with straight or oblique holder | Pilot Parallel or Manuscript fountain pen |
What Is Copperplate Calligraphy?
Copperplate calligraphy — also called English Roundhand — is a pointed-pen script defined by dramatic thick-thin contrast, a consistent 55-degree slant, and elegant, curvilinear letterforms. The name doesn’t come from the writing tool at all; it comes from copperplate engraving, the 18th-century printing method used to reproduce handwriting samples in instructional copybooks. English writing masters of the period had their penmanship etched onto copper plates so students could learn from printed exemplars, and the name stuck to the script itself.
Because those engraved plates could render extremely fine hairlines and dramatic swells, the letterforms that became “standard” Copperplate are actually slightly more exaggerated than what a pen alone naturally produces — which is part of why the script is genuinely difficult to execute convincingly by hand. You’ll also see Copperplate referred to as Engrosser’s Script or simply Roundhand in historical and calligraphy-community contexts (organizations like IAMPETH, the leading resource for pointed-pen penmanship history, use these terms somewhat interchangeably, though purists draw fine distinctions between them).
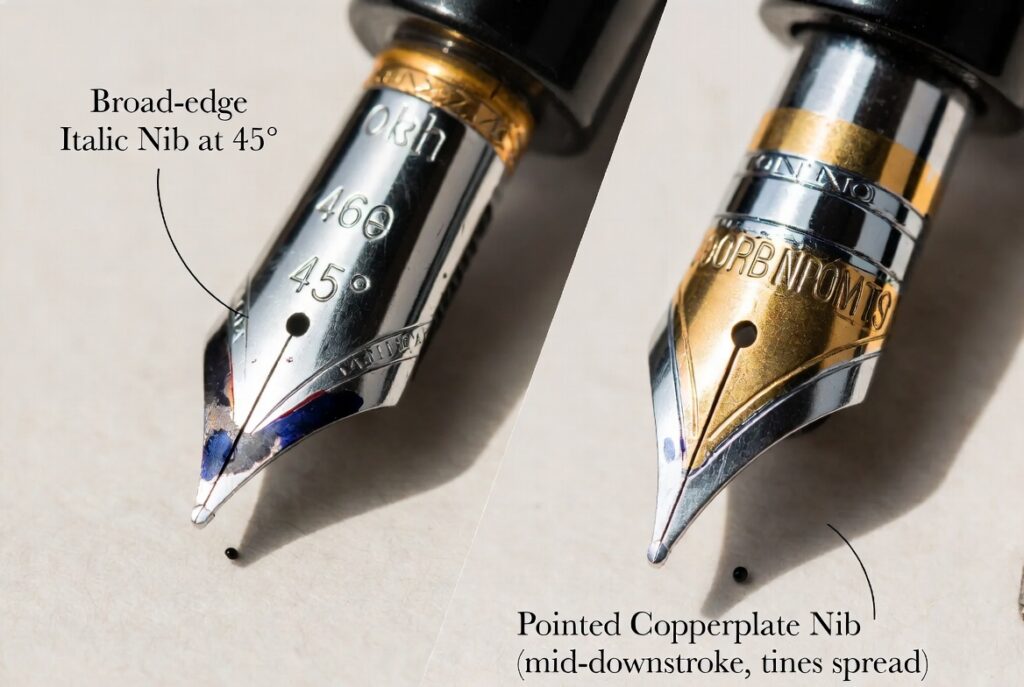
Copperplate is written with a flexible, pointed metal nib. Pressing down on the downstrokes spreads the nib’s tines apart, producing a thick line; releasing pressure on the upstrokes lets the tines snap back together for a hairline-thin stroke. That pressure-controlled contrast — not the tool’s shape — is the defining mechanical signature of the script.
What Is Italic Calligraphy?
Italic calligraphy is a broad-edge pen script that developed in Renaissance Italy during the 15th century as a faster, more compact alternative to the heavier Gothic hands used in formal manuscripts at the time. It became the preferred hand of humanist scholars and scribes precisely because it was quicker to write while remaining elegant and legible — a genuine productivity upgrade for the era.
Unlike Copperplate, Italic letters are formed with a flat-edged nib held at a consistent angle to the writing surface, typically 45 degrees. The thick and thin strokes come entirely from that fixed nib angle interacting with the direction of the stroke — not from varying hand pressure. This is the single most important mechanical difference between the two scripts, and it’s the reason most instructors recommend Italic first: you only have to master one variable (angle) instead of two (angle and pressure).
The letters themselves are built on a compressed oval, slightly forward-leaning, with consistent spacing between strokes. Once you internalize the nib angle and that basic oval shape, most Italic letters become logical extensions of a small set of foundational strokes rather than 26 individual shapes to memorize separately.
Copperplate vs Italic: The Core Differences Explained
Tool and Mechanics
Copperplate uses a pointed, flexible nib where the letterforms exist entirely because of pressure control — press to widen, release to thin. Italic uses a broad-edge nib where the letterforms exist because of a fixed angle relationship between the nib edge and the stroke direction. This is why Copperplate is often described as “unforgiving”: a shaky hand or inconsistent pressure shows up immediately in wobbly hairlines, while Italic’s angle-based system is mechanically more repeatable stroke to stroke.
Tools and Cost
Italic calligraphy uses a broad-edged nib available in either fountain pen or dip pen format. Beginner-friendly fountain pen options like the Pilot Parallel or Manuscript calligraphy pen are popular precisely because they hold ink in a built-in reservoir rather than requiring constant dipping a meaningfully lower barrier to entry for a first-time calligrapher.
Copperplate requires a pointed, flexible dip nib (the Nikko G is the most widely recommended beginner nib in the international calligraphy community), a pen holder, and calligraphy ink. The oblique pen holder is commonly recommended for Copperplate because it helps maintain the correct 55-degree slant angle naturally without twisting your wrist into an unnatural position. Some calligraphers deliberately learn on a straight holder first, to understand the script’s underlying anatomy, before switching to oblique for speed and consistency.
Paper Requirements
This is a genuinely underrated difference. Italic’s paper requirements are far less demanding than Copperplate’s — you can practice on layout paper, cartridge paper, or even good-quality printer paper without damaging your nib or producing a poor result. Copperplate, by contrast, requires smooth, bleed-resistant, dedicated calligraphy paper, because its fine pointed nib will catch, feather, or skip on rough or absorbent surfaces. This single factor makes Italic significantly more accessible and affordable to start experimenting with today, using materials you may already have at home.
Learning Curve
Once you internalize the nib angle and basic oval shape in Italic, most letters become logical extensions of a handful of foundational strokes a process most beginners move through in two to four weeks of regular short practice sessions. Copperplate’s pressure-based system takes considerably longer to feel natural, commonly several months of consistent practice before the script starts looking confident and even rather than tentative.
Copperplate vs Italic Font: Digital Use vs. Hand-Written Script
It’s worth separating the handwritten scripts covered above from Copperplate and Italic fonts — the digital typefaces designed to imitate these looks in print, on invitations, or in logo design. A Copperplate font on a screen will always show the exaggerated, engraving-inspired thick-thin contrast the historical script was named for, while an Italic font will typically read as more compact, upright-leaning, and closer to elegant cursive handwriting than to a dramatic calligraphic flourish. If you’re choosing a font for a printed piece, Copperplate-style fonts generally read as more formal and traditional, while Italic-style fonts read as more understated and legible at smaller sizes — useful to know if you’re designing invitations rather than hand-lettering them yourself.
Copperplate vs Cursive and Copperplate vs Modern Calligraphy
Two more comparisons worth clarifying directly, since both come up frequently:
Copperplate vs cursive: Ordinary cursive handwriting is a connected, efficient writing system taught for everyday use, with no requirement for pressure-based thick-thin contrast or a specific slant angle. Copperplate is a deliberate calligraphic script built on strict pressure control, consistent 55-degree slant, and exaggerated contrast — it descended from historical handwriting but is now a distinct art form, not a handwriting style you’d use to take notes.
Copperplate vs modern calligraphy: Modern calligraphy deliberately breaks from historical rules, allows inconsistent baselines and playful letterforms, and is usually written with a forgiving brush pen. Copperplate is the opposite in almost every respect — strict rules, a fixed slant, and an unforgiving pointed nib. If you want the complete side-by-side breakdown of every major style, including where Copperplate and modern calligraphy sit relative to each other, see our full guide to every calligraphy style.
Which Should You Learn First? A Decision Framework
If you are a complete beginner with no prior experience in calligraphy or drawing, start with Italic. The mechanical logic is clearer, the tools are more forgiving, the paper requirements are less strict, and the learning curve rewards your first few weeks of practice with visibly legible results — which matters enormously for staying motivated.
Start with Copperplate instead if:
- You’re specifically working toward wedding or formal stationery work and want to invest directly in that skill
- You already have steady, controlled pressure from other pointed-pen or fine-art experience (embroidery, technical drawing, etc.)
- You’re comfortable with a multi-month learning timeline before your work looks polished
Learn both, in this order, if:
- You want to become a versatile calligrapher for business or event work. Build Italic fluency first to develop pen-angle discipline and consistent spacing, then move into Copperplate once your hand is steady. Learning them simultaneously is not recommended — the mechanical demands genuinely conflict (angle-based control vs. pressure-based control), and beginners who try both at once tend to progress more slowly in each than if they’d focused on one.
If you’re also weighing Spencerian as an option, our dedicated Spencerian vs Copperplate comparison covers how that script differs from both.
How to Practice Italic Handwriting (Step by Step)
- Set your nib angle once, and hold it. Mark a 45-degree line on your practice paper if needed until the angle becomes automatic.
- Drill the basic oval shape the entire Italic alphabet is built from, before attempting any letters.
- Practice straight, angled downstrokes at the same 45-degree angle, focusing on consistent line weight rather than speed.
- Move to lowercase letters grouped by shape family (letters built on the oval, letters built on straight strokes, letters with ascenders/descenders) rather than alphabetically — this reinforces the underlying logic instead of rote memorization.
- Practice on layout or cartridge paper first, since the forgiving surface lets you focus purely on angle and rhythm before introducing a nicer (and pricier) paper stock.
- Write real words, not just isolated letters, as soon as your lowercase alphabet is legible — spacing and rhythm only develop through connected writing.
How to Start Learning Copperplate (Step by Step)
- Choose your holder. A straight holder helps you understand the script’s underlying anatomy; an oblique holder helps you maintain the 55-degree slant with less wrist strain. Many instructors recommend starting oblique directly, since it’s the format you’ll likely use long-term.
- Drill drills before letters — literally. Practice the basic “drill” (a continuous oval spiral) to build the pressure control the entire script depends on before attempting a single letter.
- Isolate the two pressure states. Practice thin hairline upstrokes and thick pressure downstrokes as entirely separate drills before combining them into strokes.
- Use ruled guide sheets with 55-degree slant lines. Freehand slant consistency is one of the hardest things to self-correct without a visual reference in Copperplate specifically, given how unforgiving the script is.
- Expect a multi-month timeline, and don’t judge your first few weeks against finished wedding-stationery examples you find online — those samples represent months or years of accumulated practice.
Tools Compared: What You’ll Actually Need to Buy
| Copperplate | Italic | |
| Nib | Nikko G (pointed, flexible) | Broad-edge nib, fountain or dip |
| Recommended beginner pen | Straight or oblique dip pen holder + Nikko G | Pilot Parallel or Manuscript fountain pen |
| Ink | Calligraphy ink (non-waterproof recommended while learning) | Fountain pen ink or cartridge |
| Paper | Smooth, bleed-resistant dedicated calligraphy paper | Layout, cartridge, or good printer paper |
| Guide sheets | 55-degree slant lines, essential | Helpful but less critical |
| Approximate starter cost | $25–40 | $15–25 |
For a fully tested, ranked breakdown across every beginner pen type — not just these two scripts — see our complete guide to the best calligraphy pens for beginners.
Common Mistakes When Learning Either Script
- Skipping isolated stroke drills to jump straight to letters — this is the single biggest cause of shaky, inconsistent results in both scripts.
- Learning both scripts at the same time — the conflicting mechanical demands (pressure control vs. angle control) slow down progress in both.
- Using the wrong paper — rough or absorbent paper will make Copperplate feel far harder than it actually is, and will damage a flexible pointed nib over time.
- Judging early Copperplate practice against finished professional samples — comparing week-two practice sheets to a wedding invitation someone spent years perfecting is a fast way to lose motivation unnecessarily.
- Ignoring guide sheets — both scripts depend on consistent slant and baseline, and freehand practice without guidelines makes those inconsistencies far harder to notice and correct early.
The History Behind Both Scripts, in More Detail
Understanding where each script came from explains why they behave so differently under the pen today.
Italic’s story starts with efficiency. Renaissance Italy needed a hand that could be written quickly by scholars and scribes producing large volumes of humanist texts, without sacrificing the elegance expected of formal writing. The compressed oval structure and consistent forward lean were a direct response to that need — every letterform is built for speed without looking rushed. Centuries later, the script was revived in English-speaking countries as an easier, more legible alternative to conventional cursive handwriting, and it remains one of the most commonly taught “formal handwriting” systems in schools to this day.
Copperplate’s story starts with printing, not writing. The script that became Copperplate was originally just English Roundhand — ordinary formal handwriting used by English writing masters from roughly 1580 to 1800. What changed its trajectory was the copper engraving process: when instructional copybooks needed to reproduce a writing master’s penmanship at scale, engravers etched the letterforms onto copper plates, and the hardness of that metal naturally produced rounder, more linear shapes than a pen alone would create.
Later penmen, working from the printed copybooks rather than an original handwritten sample, ended up learning a script that was already once removed from actual handwriting — which is part of why Copperplate feels more like a constructed art form than an evolved handwriting style. You’ll sometimes see the related terms Engrosser’s Script (used for formal documents like diplomas and certificates) and Engraver’s Script in historical and community references; organizations like IAMPETH (the International Association of Master Penmen, Engrossers and Teachers of Handwriting) are considered the leading authority on the fine distinctions between these closely related pointed-pen hands.
Choosing Between Copperplate and Italic Based on Your Goal
The “start with Italic” recommendation above holds for most complete beginners, but the right answer shifts depending on what you’re actually trying to produce.
If your goal is wedding or event stationery work: You will eventually need Copperplate fluency, since it remains the dominant script for professional formal invitations. Still start with Italic first — the pen-angle discipline and consistent spacing habits you build will make your eventual Copperplate practice noticeably faster and less frustrating than starting cold.
If your goal is everyday elegant handwriting — envelopes, cards, journaling — Italic alone may be all you ever need. Its lower tool cost, forgiving paper requirements, and shorter learning curve make it a genuinely complete skill on its own, not just a stepping stone.
If your goal is business or live event calligraphy work: Plan on learning both, in sequence, since clients will request both the fast, versatile look of Italic-adjacent scripts and the formal elegance of Copperplate depending on the event. Our comparison of modern vs. traditional calligraphy courses covers how to structure that broader learning path.
If you’re drawn to Copperplate specifically for its aesthetic and are willing to commit to a multi-month timeline regardless of difficulty, there’s a reasonable case for starting there directly — motivation driven by genuine enthusiasm for a specific look often outlasts the frustration of a harder learning curve. Just go in with realistic expectations about the timeline rather than comparing your week-two practice sheets to finished professional samples.
Troubleshooting: Why Your Script Doesn’t Look Right Yet
For Copperplate specifically:
- Hairlines are inconsistent or shaky — this is almost always a pressure problem, not a letters problem. Return to isolated upstroke drills (thin, minimal pressure) before attempting full letters again.
- Downstrokes aren’t thick enough — you likely need more confident pressure on the nib; a hesitant touch will keep the tines from spreading fully.
- The slant looks “drunk” or inconsistent — this is the single most common Copperplate complaint, and it’s almost always solved by switching to a guide sheet with printed 55-degree slant lines rather than trying to judge the angle freehand.
For Italic specifically:
- Letters look flat with no contrast — check your pen angle. If it drifts away from 45 degrees mid-stroke, the thick-thin contrast disappears, since the whole effect depends on that fixed relationship.
- Strokes feel inconsistent in width — this usually means the nib is rotating slightly in your hand between strokes; a consistent grip matters more in Italic than most beginners expect.
- Letters feel cramped or uneven in spacing — this is a rhythm issue that improves specifically through writing connected words rather than isolated letters, since spacing only becomes intuitive in context.
For both scripts:
- You’ve plateaued despite regular practice this is the point where in-person feedback typically saves weeks of trial and error, since pressure, angle, and posture issues are genuinely difficult to self-diagnose from your own handwriting alone.
Frequently Asked Questions
Copperplate calligraphy, also called English Roundhand, is a pointed-pen script defined by a consistent 55-degree slant and dramatic pressure-based thick-thin contrast. It developed from 18th-century English writing masters whose penmanship was engraved onto copper printing plates for instructional copybooks, which is where the name comes from.
Copperplate uses a pointed, flexible nib with thick-thin contrast created by hand pressure and a strict 55-degree slant. Italic uses a broad-edge nib with a fixed 45-degree angle, where the contrast comes automatically from the nib’s shape rather than pressure control. Italic is generally considered more forgiving and faster to learn.
Italic is easier for most beginners because it depends on a single consistent variable pen angle rather than the pressure control that Copperplate requires. Most beginners reach legible Italic letterforms in two to four weeks, compared to several months for Copperplate.
No. Ordinary cursive is an efficient, connected handwriting system with no formal pressure or slant requirements. Copperplate is a deliberate calligraphic script with strict pressure control, a fixed 55-degree slant, and exaggerated contrast, making it a distinct art form rather than everyday handwriting.
A pointed, flexible dip nib (the Nikko G is the standard beginner recommendation), a straight or oblique pen holder, non-waterproof calligraphy ink, and smooth, bleed-resistant paper. Guide sheets with 55-degree slant lines are strongly recommended.
A broad-edge nib, either as a fountain pen (Pilot Parallel and Manuscript are popular beginner choices) or a dip pen. Italic is far less demanding on paper layout, cartridge, or good printer paper all work well while you’re learning.
It’s not recommended. The two scripts rely on genuinely different mechanical skills pressure control versus angle control and practicing both simultaneously tends to create conflicting habits that slow progress in each. Build a solid foundation in one before introducing the other.
Copperplate and its modern derivatives dominate professional wedding stationery, prized for their formal, elegant appearance. Italic appears more often in envelope addressing and less formal correspondence, though both can work beautifully depending on the couple’s aesthetic direction.
Most beginners need several months of consistent practice before Copperplate starts looking confident and even, since the script depends entirely on developed pressure control. For a full breakdown of realistic timelines across every major style, see our honest calligraphy learning timeline guide.
Largely, yes. English Roundhand is the original historical handwriting style; Copperplate is the name that stuck once that handwriting was engraved onto copper printing plates for instructional copybooks. Some calligraphers also use “Engrosser’s Script” for the closely related American adaptation used for legal and ceremonial documents.
Reading about the mechanics of Copperplate and Italic is useful, but pressure control and pen angle are genuinely difficult to self-diagnose from photos or video alone. Book a beginner calligraphy workshop with Carla for hands-on, real-time correction on whichever script you choose or explore custom calligraphy services if you need Copperplate-style work done for an upcoming wedding or event rather than learning it yourself.