

To address a wedding envelope in calligraphy, write the guest’s full name and title on the outer envelope in your chosen script (commonly Copperplate or Modern Calligraphy), followed by the full mailing address on the lines below, keeping the layout centered and legible above all else. If you’re using an inner envelope, it carries a shorter, less formal version — typically just titles and last names, or first names for close family. The specific wording changes based on who you’re addressing: a married couple, a family with children, an unmarried couple, or a guest with a formal title.
Your wedding invitations are the first glimpse your guests get of your special day, and the envelope sets the stage for what’s inside. Adding calligraphy to your envelopes turns a simple address into a small work of art, infusing elegance and personality into your stationery before the envelope is even opened. This guide walks through exactly how to address wedding envelopes in calligraphy — the etiquette, the layout, the tools, and the step-by-step process — plus how to approach calligraphy for the invitation suite as a whole, whether you’re doing it yourself or hiring it out.
How to Address Envelopes in Calligraphy: Step by Step
- Gather your finalized guest list first. Confirm full names, titles, and complete mailing addresses before you touch a pen — corrections on finished calligraphy envelopes are difficult and can ruin an otherwise perfect piece.
- Choose your script. Copperplate is the traditional, formal choice for wedding envelopes; Modern Calligraphy suits a more relaxed or contemporary wedding. See the style section below for a full comparison.
- Plan your layout before you write. Lightly pencil in guide lines, or use a light box or template, to center the name and address block on the envelope. This single step prevents the majority of beginner mistakes on this list.
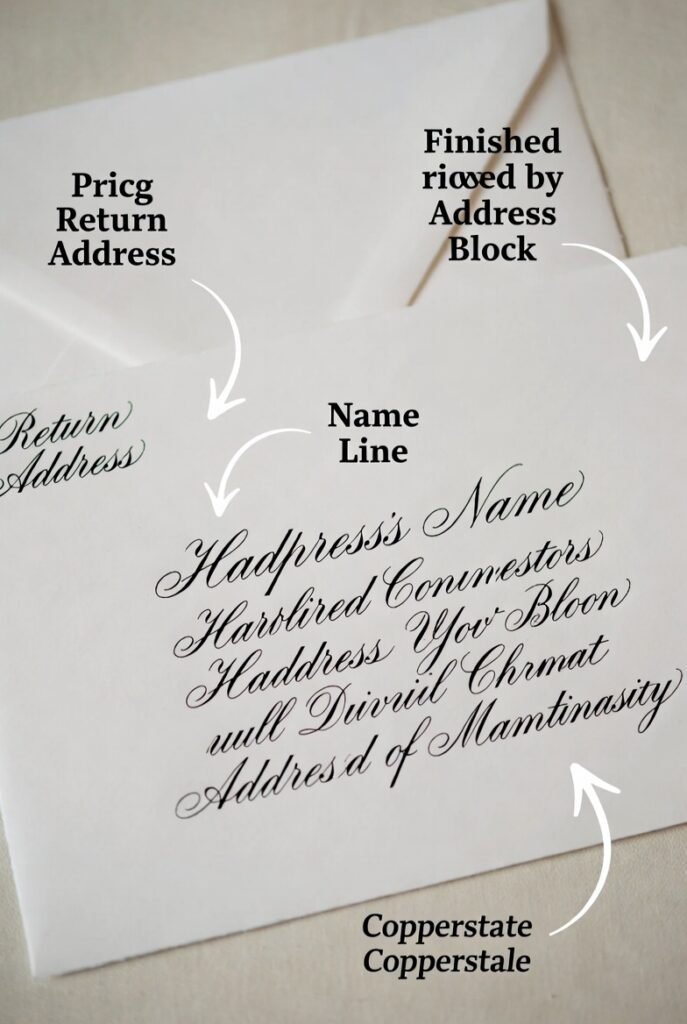
- Write the name line first, since it’s typically the largest and most decorative element, and everything else is sized relative to it.
- Write the address block below, keeping the street address, city/state, and zip code on clearly separated lines, with slightly more restrained lettering than the name line so the address stays fully legible for postal sorting.
- Let the ink dry completely before handling the envelope, especially with metallic or specialty inks, to avoid smudging.
- Do a test envelope first. Practice the full layout — name and address — on a spare envelope before starting on your real stack, so you can catch spacing or legibility issues while the stakes are low.
- Add postage last, once you’ve confirmed placement won’t interfere with your address block or return address.
Outer vs. Inner Envelope: What Goes Where
Traditional formal wedding invitations use two envelopes, though many modern weddings now skip the inner envelope entirely for simplicity and cost. Here’s what each one is for and how the etiquette differs between them.
Outer envelope — This is the one that goes through the mail, so it needs to be both elegant and highly legible. It carries the guest’s full name and title, complete mailing address, and your return address (return address is typically printed or handled in a simpler companion hand rather than full calligraphy, since it’s not the focal point).
Inner envelope — A smaller, unsealed envelope inside the outer one, used only in more formal or traditional wedding suites. It carries a shorter, less formal version of the name — titles and last names only (“Mr. and Mrs. Smith”), or first names for close family and friends. This is also where you’d indicate which children or additional guests are specifically invited, since children generally don’t get their own line on the outer envelope.
Do you need both? Not necessarily. Inner envelopes add a layer of formality and are especially useful for indicating exactly which household members or plus-ones are invited, but plenty of elegant modern weddings use only a single, well-addressed outer envelope. If you skip the inner envelope, make sure who’s invited (just the couple, the whole family, a plus-one) is clear either in the invitation wording itself or on your wedding website.
Wedding Envelope Addressing Etiquette by Situation
This is where most people actually get stuck — not the handwriting, but the wording. Here’s how to handle the most common scenarios.
Married couple, same last name: Outer: Mr. and Mrs. John Smith Inner: Mr. and Mrs. Smith
Married couple, woman kept her maiden name: Outer: Ms. Sarah Jones and Mr. John Smith Inner: Sarah and John
Unmarried couple living together: Outer: Ms. Jane Doe and Mr. Mark Johnson (alphabetical order or whichever name you’re closer to is fine — there’s no strict rule requiring one gender first) Inner: Jane and Mark
Family with children under 18: Outer: Mr. and Mrs. John Smith (children are not listed on the outer envelope) Inner: Mr. and Mrs. Smith, Emily and Timmy — or, without an inner envelope, add “and Family” to the outer envelope name line.
Children over 18 living at home: They should receive their own invitation, separate from their parents’, even if they still live in the same house — it’s a small but meaningful courtesy.
Guest with a professional or formal title: Use the title in place of “Mr./Ms./Mrs.”: Dr. Amara Johnson, The Reverend Michael Lee, Judge Patricia Lin. Elected officials and certain formal titles (bishops, judges, ambassadors) often take “The Honorable” before the full name — for example, The Honorable Sandra Lee — a convention worth double-checking against current etiquette guidance for the specific title if you’re unsure.
Guest with a plus-one: Only list a named plus-one if you know their name; otherwise, “and Guest” on the inner envelope (never the outer) is the traditional approach, though many modern couples prefer to collect the guest’s name in advance via RSVP so everyone can be addressed by name.
Same-sex couples: The same conventions apply as any married or unmarried couple — alphabetical order or personal preference both work fine for whose name appears first, since there’s no traditional rule that applies here in the first place.

How to Create Wedding Invitation Calligraphy (The Full Suite)
Envelope addressing is usually the first calligraphy project couples think about, but a full invitation suite typically involves several coordinated pieces. Here’s how the process comes together.
- Start with your invitation wording and finalized text, since calligraphy layout depends entirely on knowing exactly how much text needs to fit on each piece.
- Choose one primary script for consistency across the suite — mixing too many styles across invitations, envelopes, and place cards can feel disjointed rather than intentional.
- Decide which pieces get hand calligraphy vs. digital calligraphy. Full hand-lettering on every invitation in a large guest list is time-intensive and costly; many couples reserve hand calligraphy for envelopes and reception details (place cards, menus, signage) while using digital calligraphy — lettering designed to look hand-done, then printed — for the invitation card itself.
- Plan your layout hierarchy. Names and key details (the couple’s names, the date) are typically the most decorative and largest element; supporting details (RSVP information, dress code, venue address) use a more restrained companion script for legibility.
- Proof everything before final production. Guest names, dates, and addresses should be checked against your master guest list at least twice, since a single misspelled name on a hand-lettered piece is far more costly to fix than a printed one.
- Build in a realistic timeline. Most wedding calligraphy projects — invitations, envelope addressing, and reception pieces together — take four to eight weeks depending on complexity and guest count, so plan to start the calligraphy process well ahead of your mailing date.
For the full cost breakdown of what a suite like this typically involves, see our wedding calligraphy pricing guide and our dedicated wedding envelope calligraphy cost guide.
DIY Calligraphy vs. Hiring a Professional
DIY makes sense if: You have time to practice well before your mailing date, a smaller guest list, and genuinely enjoy the process — many couples find hand-addressing their own envelopes to be a meaningful, meditative part of wedding planning rather than just a task to check off.
Hiring a professional makes sense if: You have a larger guest list, a tight timeline, want a formal script like Copperplate executed at a consistently high standard across every envelope, or simply want one less thing on your plate during an already busy planning season. Consistency is genuinely difficult to maintain across 100+ envelopes without significant practice — a professional calligrapher brings both speed and uniform quality that’s hard to replicate as a first-time hobbyist.
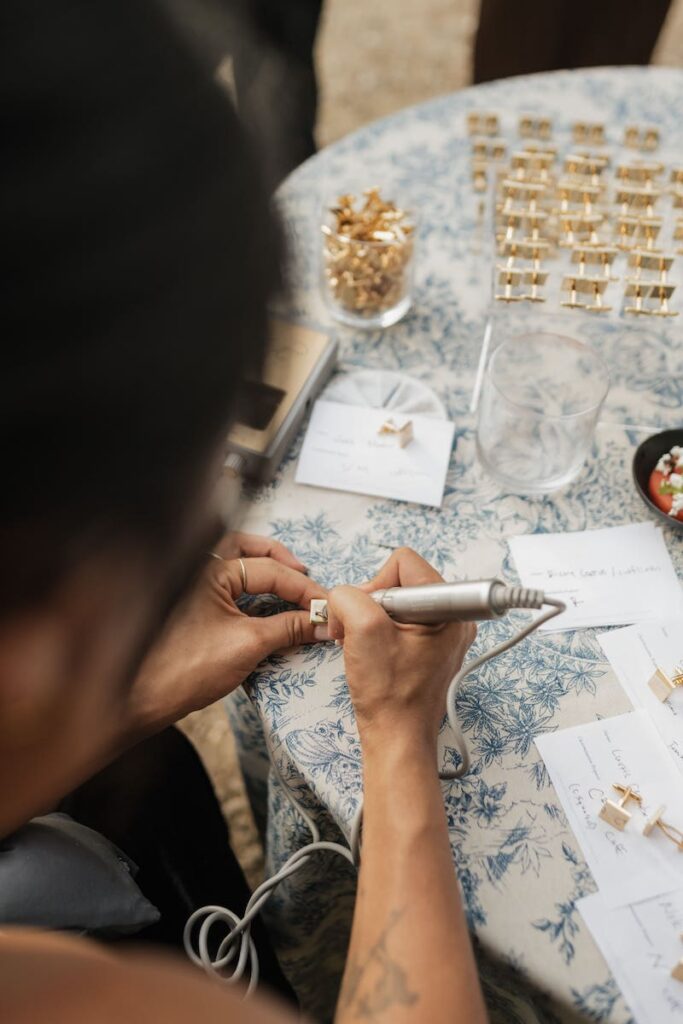
Who offers guest addressing, calligraphy, and envelope printing for wedding invites? At Carla Schall Designs, envelope addressing is one of our most requested wedding services, alongside full invitation suites, place cards, signage, and live event calligraphy — see our wedding and event calligraphy services or get in touch for a custom quote based on your guest count and timeline.
Digital Calligraphy for Envelopes and Invitations
If hand calligraphy isn’t in your budget or timeline, digital calligraphy — hand-lettering designed digitally and then printed directly onto envelopes or invitation cards — is a genuinely good alternative that preserves the look of calligraphy at a lower cost and faster turnaround. It’s particularly well suited to larger guest lists, where achieving perfect consistency by hand across hundreds of envelopes would be both expensive and time-consuming. Many couples blend the two approaches: digital calligraphy for the invitation suite itself, paired with hand-addressed outer envelopes for that extra layer of personal touch where guests notice it most.
Best Pens and Tools for Addressing Wedding Envelopes
- For Copperplate (formal, traditional look): A pointed, flexible dip nib such as a Nikko G or Brause 66EF, an oblique or straight pen holder, and non-waterproof calligraphy ink for the cleanest line quality.
- For Modern Calligraphy (relaxed, contemporary look): A brush pen such as a Tombow Dual Brush or Tombow Fudenosuke — no dip pen or ink preparation required, which makes it far more forgiving for a first-time DIY project.
- Paper and envelopes: Choose thick, textured, bleed-resistant envelopes to avoid feathering, especially with a pointed nib. Test your specific ink-and-envelope combination on a spare piece before committing to your full stack.
- Guide sheets or a light box: Essential for keeping your layout centered and consistent across a large batch of envelopes, regardless of which script you’re using.
For a full breakdown of where to source these supplies locally, see our guide to calligraphy supplies in Florida.
Wedding Calligraphy Styles for Envelopes
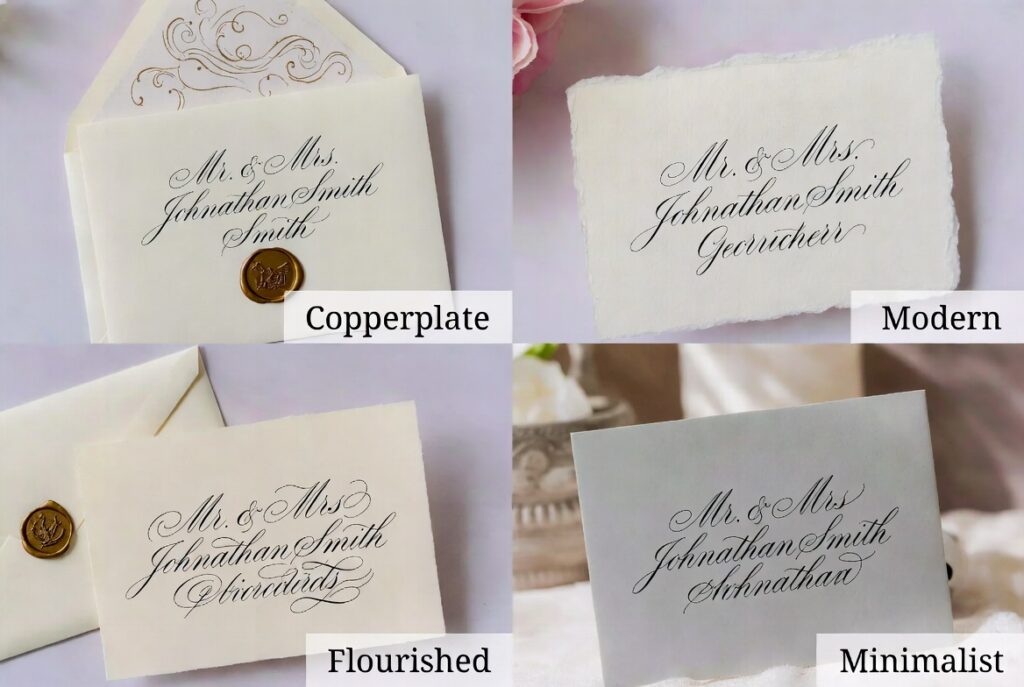
Copperplate remains the most traditional and most-requested style for formal wedding envelopes, with its elegant, engraved-looking thick-thin contrast and consistent slant.
Modern Calligraphy suits a more relaxed or contemporary wedding aesthetic, with expressive, bouncy letterforms and a faster learning curve for couples addressing their own envelopes.
Flourished Calligraphy adds decorative embellishments to a base script (often Copperplate) for a bolder, more glamorous statement, well suited to formal or black-tie weddings.
Minimalist Calligraphy strips detail back to clean, simple letterforms for a modern aesthetic, particularly popular for understated or contemporary venue styles.
For the full comparison of every major calligraphy script — not just the wedding-specific shortlist above — see our complete guide to types of calligraphy styles, or our beginner style guide if you’re planning to DIY and need help choosing where to start.
Common Mistakes to Avoid
Even seasoned calligraphers make these mistakes occasionally — here’s how to avoid the ones that trip up beginners most often.
- Poor centering. Use a light box, template, or laser level to keep the name and address block centered on the envelope, and practice your layout on scrap paper first.
- Ink smudging or bleeding. Test your ink on a sample envelope to check for bleeding, let ink dry completely before handling, and avoid heavily textured envelopes if possible.
- Illegible writing. Prioritize readability, especially for the address block — avoid overly flourished styles where they obscure the text, and keep practicing until every letter is genuinely clear, not just decorative.
- Running out of space. Plan your layout from the bottom up. Write out a sample address to estimate spacing before committing pen to your real envelope stack.
- Inconsistent style across the batch. Maintain consistent letter sizes and spacing throughout, and use guidelines or a template to keep every envelope uniform, especially on larger guest lists.
How Much Does Envelope Calligraphy Cost, and When Should I Book?
Simple envelope addressing typically runs $2.25–$5 per envelope depending on script complexity, ink, and envelope material, with full invitation suites and larger projects scaling up from there. Because wedding calligraphy is genuinely time-intensive, book your calligrapher six to eight months in advance to guarantee availability and leave enough time for customization. For the complete, up-to-date cost breakdown, see our wedding envelope calligraphy cost guide and our full wedding calligraphy pricing guide.
Two doctors or professionals married to each other: Outer: Doctors Sarah and John Smith or Dr. Sarah Smith and Dr. John Smith if you prefer both names spelled out in full.
Military titles: Rank typically precedes the name and takes priority over “Mr.,” for example Captain James Wilson and Mrs. Wilson, with the specific rank spelled out rather than abbreviated for formal wedding correspondence.
Widowed guest: A widow traditionally retains her late husband’s name and title unless she’s indicated otherwise: Mrs. John Smith, though many modern etiquette guides now also accept Mrs. Mary Smith as a perfectly appropriate, more personal alternative.
Divorced guest: Traditionally addressed using her own first name with her married or maiden last name, whichever she currently uses: Ms. Mary Smith or Ms. Mary Jones, never combined with her ex-husband’s first name.
Save-the-Date Envelopes: What’s Different
Save-the-dates follow largely the same addressing etiquette as formal invitations, with a few practical differences worth knowing:
- They’re typically less formal. Since save-the-dates are an early, informal heads-up rather than the official invitation, many couples use a slightly more relaxed script (Modern Calligraphy rather than strict Copperplate) even if the wedding itself will be formal.
- They rarely use an inner envelope. Save-the-dates are almost always single-envelope mailings, since the more detailed guest-list decisions (who’s invited, plus-ones, children) are typically finalized later for the formal invitation.
- Send them to the full household you intend to invite, even before your guest list and plus-one decisions are fully locked — you can always be more specific on the formal invitation itself once those details are confirmed.
A Quick Pre-Mailing Checklist
Before your envelopes go in the mail, run through this list = it catches the mistakes that are cheap to fix now and expensive (or impossible) to fix later.
- [ ] Guest list cross-checked against your master spreadsheet for spelling and current addresses
- [ ] A test envelope completed and reviewed for spacing, centering, and legibility
- [ ] Ink fully dried and smudge-tested on your specific envelope paper stock
- [ ] Return address confirmed and placed consistently across every envelope
- [ ] Postage weight-checked (calligraphy ink, wax seals, and inner envelopes can push an invitation suite over standard postage weight, requiring extra stamps)
- [ ] A few blank spare envelopes set aside in case of addressing mistakes on your final batch
Why Hand Calligraphy Still Matters for Wedding Envelopes
In an era where digital printing can replicate almost any font instantly, hand calligraphy remains popular precisely because it can’t be replicated at scale — every stroke carries small, human variation that a printed font simply doesn’t have. For many guests, a hand-addressed envelope is the first tactile signal that a wedding will be thoughtfully personal rather than mass-produced, and it’s genuinely common for guests to keep beautifully addressed envelopes as keepsakes long after the wedding itself. That emotional weight is exactly why couples who have the budget for it so often prioritize envelope calligraphy even when they simplify other parts of their stationery suite.
General Envelope Basics (Beyond Wedding Calligraphy)
A few of the questions we see most often aren’t wedding-specific at all — just general envelope-addressing basics worth covering here since they come up in the same search.
How do you fill out an envelope to mail? Write the recipient’s name and address in the center of the envelope, and your own return address in the top-left corner (or on the back flap, depending on your preferred format). Place the stamp in the top-right corner of the front.
How do you address a formal letter envelope? Use the recipient’s full name with an appropriate title (Mr., Ms., Dr., or a professional title), followed by their complete address on the lines beneath, similar in structure to a formal wedding envelope but without the decorative calligraphy.
International guests? Add the destination country as its own line beneath the city, state or region, and postal code, written in the format expected by that country’s postal service where possible, and double-check current international postage rates before mailing, since they differ from domestic rates and affect how much postage you’ll need.
Frequently Asked Questions
Write the guest’s full name and title on the outer envelope in your chosen script, followed by the complete mailing address below it, keeping the layout centered and legible. If using an inner envelope, use a shorter, less formal version of the name.
The front (outer envelope) carries the guest’s full name and formal title, followed by their complete mailing address. Your return address typically goes on the back flap or top-left corner of the front, usually in a simpler companion script rather than full decorative calligraphy.
It’s not required, but hand-addressed envelopes are widely considered a meaningful, elegant touch that sets the tone for the entire wedding stationery suite. Digital calligraphy is a strong alternative if budget or timeline make full hand addressing impractical for a large guest list.
Traditionally, “Mr. and Mrs.” followed by the husband’s first and last name (for example, “Mr. and Mrs. John Smith”) on the outer envelope. If the woman kept her maiden name, list both full names separately, such as “Ms. Sarah Jones and Mr. John Smith.”
Children are not listed on the outer envelope. Address the outer envelope to the parents only, then either add “and Family” to the outer envelope or list the children’s first names on the inner envelope if you’re using one.
The outer envelope is the formal, mailed envelope carrying the guest’s full name, title, and complete address. The inner envelope, used for more traditional or formal suites, is a smaller, unsealed envelope carrying a shorter, less formal version of the name.
Use their formal title in place of “Mr./Ms./Mrs.,” such as “The Reverend” for many clergy titles or “The Honorable” for judges and certain elected officials, followed by their full name. Titles and conventions vary by role, so it’s worth confirming the specific convention for less common titles.
For a traditional Copperplate look, a pointed, flexible dip nib such as a Nikko G paired with an oblique holder is the standard choice. For a more relaxed, modern look, a brush pen such as a Tombow Dual Brush is far more forgiving for a first-time DIY project.
Digital calligraphy tools and services create hand-lettered-style designs digitally, which are then printed directly onto your invitations or envelopes. It’s a cost-effective, consistent alternative to fully hand-lettered pieces, especially useful for larger guest lists where achieving uniform hand calligraphy across every piece would be costly and time-consuming.
Book six to eight months before your wedding date to guarantee availability and allow enough time for design, customization, and production, especially during peak wedding season.
Postage only goes on the outer, mailed envelope — the inner envelope, if you’re using one, is never mailed on its own and doesn’t need a stamp. Place the stamp in the top-right corner of the outer envelope, positioned so it doesn’t overlap or interfere with your calligraphy or the address block.
Whether you’re planning to hand-address your own envelopes or want the whole invitation suite handled for you, getting the wording and layout right matters as much as the penmanship. Get in touch about wedding and event calligraphy services for a custom quote, or book a beginner calligraphy workshop if you’d like hands-on guidance before tackling your own envelopes.