


Event planners who add live calligraphy to a brand activation for the first time often walk away with two reactions: genuine delight at how the experience landed, and a mental list of everything they would do differently next time. Live calligraphy activations are among the highest-impact experiences available in experiential marketing, but they have specific operational requirements that differ from almost every other event element. Getting those details right is the difference between a seamless, photographable, guest-loved moment and a chaotic queue at a cramped table that frustrates everyone. This step-by-step guide is written for event planners, brand managers, and agency teams who want to plan a live calligraphy brand activation with confidence and execute it without surprises.
Step 1: Define the Activation’s Role in the Event
Before you write a brief or contact an artist, establish exactly what the live calligraphy activation is meant to accomplish.
Is it the centrepiece of the guest experience? A supporting touchpoint in a larger journey? A gifting mechanism? An ambient entertainment element? A social media driver?
The answer shapes everything, from station location and artist count to the duration of each personalisation interaction.
A centrepiece activation calls for a prime position, multiple artists if the guest count is high, and a personalisation offering with genuine depth. An ambient touchpoint can be smaller, quieter, and positioned in a corner or secondary space.
Brands that commission live calligraphy for brand activations in Florida with the most successful outcomes define this role before any other planning decision is made.
Step 2: Choose the Right Personalisation Technique
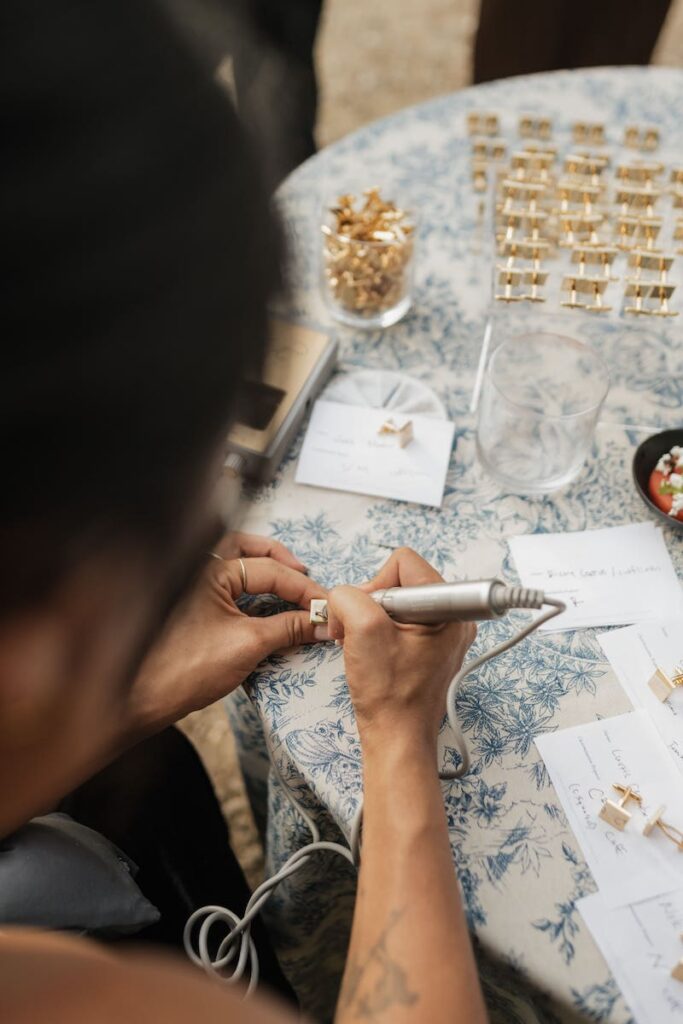
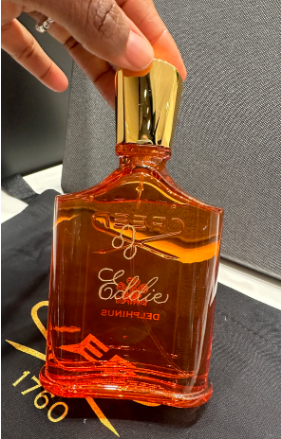
Live calligraphy activations can feature ink calligraphy, hand engraving, hot foiling, glass engraving, bottle painting, or a combination depending on the products being personalised and the brand aesthetic.
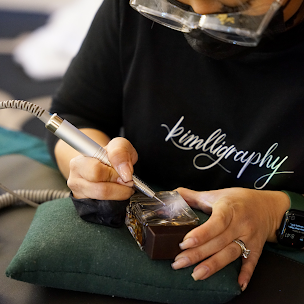
Each technique has different setup requirements, throughput rates, and product compatibility constraints. Ink calligraphy on paper-based materials is the most flexible and fastest. Hand engraving on glass or metal requires more time per piece and specific tooling. Hot foiling on leather or packaging is visually spectacular but requires a small press unit and setup time.
Glass engraving versus hot foiling at events is a valuable comparison for planners choosing between these two popular premium options.
Your artist will guide technique selection once they understand the products and the throughput expectations. Do not finalise your technique without that consultation.
Step 3: Write a Thorough Artist Brief
The artist brief is the most important document in your pre-event planning. It should cover every dimension of the activation from aesthetic to logistics.
A complete brief includes the brand name and a summary of brand guidelines and visual identity, the event date, location, and schedule, the products to be personalised with dimensions and surface specifications, the expected guest count and anticipated peak periods, the personalisation options available to guests, any names or messages that should not be inscribed, the station’s physical dimensions and position within the venue, lighting conditions, power availability, and the brand’s social media handles for the artist to tag.
The more thorough your brief, the fewer surprises on the day. Your artist should be able to walk into the venue with clear expectations about what they will find and what is expected of them.
Download and use the brand activation live artist checklist as a foundation for your briefing process.
Step 4: Confirm Product Sampling and Material Testing
Once your artist has reviewed the brief and confirmed their availability, arrange for product samples to be sent for pre-event testing.
This is a non-negotiable step for any activation involving hard goods such as glass, metal, acrylic, or leather. The artist needs to verify that the intended technique produces the expected result on the specific product before the event.
Testing may reveal that a planned technique does not work on a particular surface finish, that a different approach will produce better results, or that the product requires a surface preparation step before personalisation. These discoveries need to happen before the event, not during it.
For activations involving premium or limited-edition products, also confirm the number of spare units available in case of errors during the event.
Step 5: Design the Guest Flow
Poor guest flow is the most common reason a well-intentioned live calligraphy activation fails to deliver on its promise. The two failure modes are queues that stretch unmanageably long and processing so slow that guests give up before receiving their personalised item.
Map the guest flow explicitly. Where do guests first learn about the personalisation option? Where do they queue? How are they managed while waiting? Where do they collect their completed piece?
For events with more than 100 guests and a four-hour window, a digital intake system dramatically improves flow. Guests scan a QR code, submit their personalisation request, and receive a notification when their piece is ready. This eliminates the standing queue and allows guests to enjoy the event between submission and collection.
For smaller, more intimate activations, a personal approach where the artist converses directly with each guest creates a premium feel. The queue management approach should match the brand’s positioning and the event’s scale.
Step 6: Plan the Station Aesthetics
The personalisation station is a brand touchpoint and it will be photographed extensively. Its aesthetic must align with the brand’s visual identity.
Work with your artist to agree on table covering, props, signage, and any branded elements on the station. Provide the artist with brand colour specifications and any design restrictions.
Consider whether the tools themselves should be styled or concealed. A calligrapher’s array of pens, brushes, and inks can be visually appealing and reinforces the craft narrative. An engraver’s rotary tools may need a more considered presentation.
Signage at the station should clearly communicate what personalisation is available and how guests access it. Do not make guests guess whether they are welcome to approach or what they can request.
Step 7: Coordinate Logistics With the Venue
Live calligraphy and engraving activations have specific venue requirements that planners must coordinate in advance.
Power access is required for engraving equipment and any lighting units brought by the artist. Confirm outlet proximity to the planned station location.
Adequate lighting is essential. Ask your artist what light level they require and whether they bring their own supplementary lighting. Many venues have beautiful ambient lighting that is inadequate for precise hand work.
Ventilation matters for activities using solvent-based inks or engraving that produces fine dust. Confirm that the space has adequate air movement for the technique being used.
Early artist access for setup, typically 60 to 90 minutes before guest arrival, should be written into the venue contract.
Step 8: Communicate the Activation to Guests
Guests who do not know about the personalisation station cannot participate. Communication before and during the event drives traffic and engagement.
Pre-event: Include a teaser in your event invitation or save-the-date that hints at a personalisation experience. Do not over-describe it. Anticipation works in your favour.
During the event: Direct guests to the station through MC announcements, signage throughout the venue, and staff who actively invite participation.
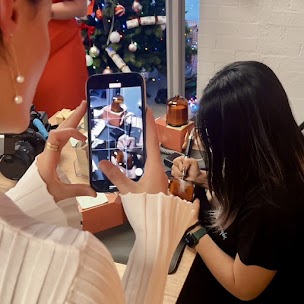
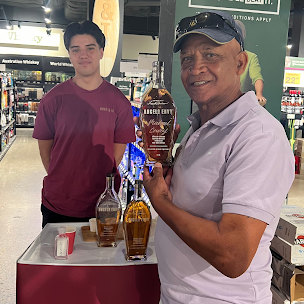
Capture content: Assign a photographer or ensure that your event photographer specifically documents the live calligraphy experience. Footage of the artist working and of guests receiving their personalised pieces is among the most compelling content any brand activation generates.
Step 9: Budget Accurately
Live calligraphy activation pricing reflects the artist’s experience, the techniques used, the duration of the event, the complexity of the personalisation options, and any travel or accommodation required.
A complete activation budget should include the artist fee covering all techniques and hours, a material cost for inks, tools, and consumables, travel and accommodation if applicable, product loss allowance for testing and errors, station styling and signage, and any photographer or content capture costs specific to the activation.
Live calligraphy event pricing in Florida provides current cost benchmarks for planning purposes. The live foiling cost guide is useful for events featuring hot foiling specifically.
Step 10: Debrief and Document
After the activation, gather your data. How many pieces were personalised? What was the peak throughput period? What social content was generated and what was its reach?
Ask your artist for their observations on guest behaviour, queue management, and any unexpected challenges. Their on-the-ground perspective contains insights that data alone misses.
Use this debrief to build a stronger brief for your next activation. Each iteration improves the outcome.
Conclusion
A live calligraphy brand activation executed well is one of the most impactful investments in experiential marketing available to brands today. It creates genuine emotion, drives organic content, and delivers personalised items that function as brand ambassadors for years.
The difference between a great activation and a frustrating one is almost entirely in the planning. Work through each of these steps with care, communicate thoroughly with your artist, and give the operational details the attention they deserve.
When the guest holds their personalised piece up to the light and smiles, all of that invisible preparation becomes visible in the most satisfying way possible.
Frequently Asked Questions
At a standard luxury pace of ten to fifteen pieces per hour, one artist can produce 40 to 60 pieces during a four-hour event. For 200 guests where most will want personalisation, two to three artists working simultaneously is recommended.
Yes, with weather contingency planning. Outdoor lighting, wind, and temperature all affect ink behavior and artist comfort. Discuss outdoor-specific precautions with your artist during the briefing.
Near a natural guest traffic path but not in a corridor that creates congestion. Visibility from multiple angles encourages organic discovery. Avoid placing the station directly adjacent to the bar, which creates competing traffic patterns.
For most luxury activations, a dress code brief is appropriate. The artist should complement the brand’s visual world. Providing a preferred colour palette or formal/casual guidance is helpful.
Pre-event, confirm whether non-Latin scripts will be offered and ensure your artist has the relevant language capability. For multilingual events, this detail must be in the brief.
Ready to plan a live calligraphy activation that guests will talk about for months? Contact Carla Schall to discuss your event and receive a customised proposal.